Building your own PC could have all the earmarks of being a mind-boggling adventure, especially for a fledgling. You might be concerned it's unnecessarily confounded, unreasonably exorbitant, or excessively dreary, but it needn't bother with to be.
In this helper, we'll get a handle on how for manufacture a PC step by step, starting with making sense of your PC needs, sorting out the different bits of a PC, finally guiding you through the PC develop process.
Assuming that YOU'VE BEEN pounding yourself about doing nothing useful during our endless pandemic, stop. Once in a while doing nothing is precisely very thing you want. Different times, making something with your own hands is great. That is what's going on with this aide: how to fabricate a PC without any preparation.
It tends to plague for a great deal of reasons — it's costly, it's intricate, it can get muddled. Yet, I need honestly: In the event that you can fabricate an Ikea table, shelf, bed, or anything that comes in more than one of those deceivingly weighty level packs, you can construct a PC. The precarious part? I can't let you know how to assemble your PC. Not actually. Not except if I know precisely which equipment you're utilizing. I can, nonetheless, make sense of what every part does and what my proposals are for every class.
Whenever you've fabricated your brand new PC, it very well may be an ideal opportunity to look at another stuff to advance decorate your new sidekick. Make certain to view our aides for the best gaming consoles, best gaming mice, best gaming headsets, and best gaming regulators.
Refreshed April 2022: We've taken out certain picks that are elusive, included a part purchasing exhortation, and added more data to every item generally impacted by deficiencies.
First, Let’s Talk Shortages:
For a considerable length of time currently we've been amidst a PC equipment lack. To begin with, digital money excavators purchased up all the GPUs to cultivate crypto, then we got hit by an overall silicon deficiency, and afterward there was that entire thing. Point is, it's difficult to get every one of the parts you really want to construct a PC, it has been for quite a long time, and it's probably going to keep being intense for years to come. I can't fix a worldwide coordinated factors emergency, however I can give you a few pointers on shopping during one.
Untouchable Markup
While you're searching for parts, guarantee you're buying from a genuine shipper. You could accept you're buying from a tremendous web based store like Amazon, Walmart, or Newegg, but they license pariah vendors to list things as well. There's by and large a little warning that will tell you so much, right under the buy button.
If conveyed and sold from someone isn't Amazon, Walmart, or Newegg, you're apparently going to pay more for the part than its retail cost. For instance, our top motherboard pick retails for $130, yet as of this making its recorded on Newegg for $205. It's moved and sold from a pariah retailer, thusly the markup. First-party bargains (when the thing is sent and sold by the store whose site you're visiting) will by and large have better costs that slice closer to the authentic producer suggested retail esteem (MSRP) of the thing.
We've attempted to adhere to first-party deals, however some of the time parts are simply not accessible through anybody but rather an outsider. All things considered, my recommendation is don't spend in excess of 50% over the MSRP on any of these parts. Give yourself a hard financial plan and kindly don't pay twofold or triple what any of these parts are worth.

What is it that You need?
To get a rundown of parts together, regardless of what your experience level is, you ought to utilize PC Part Picker. Besides the fact that it has all that you want to get, it likewise allows you to construct your PC piece by piece right on the site and ensures all your equipment will play pleasantly together. It even has a couple of model forms you can change however you would prefer.
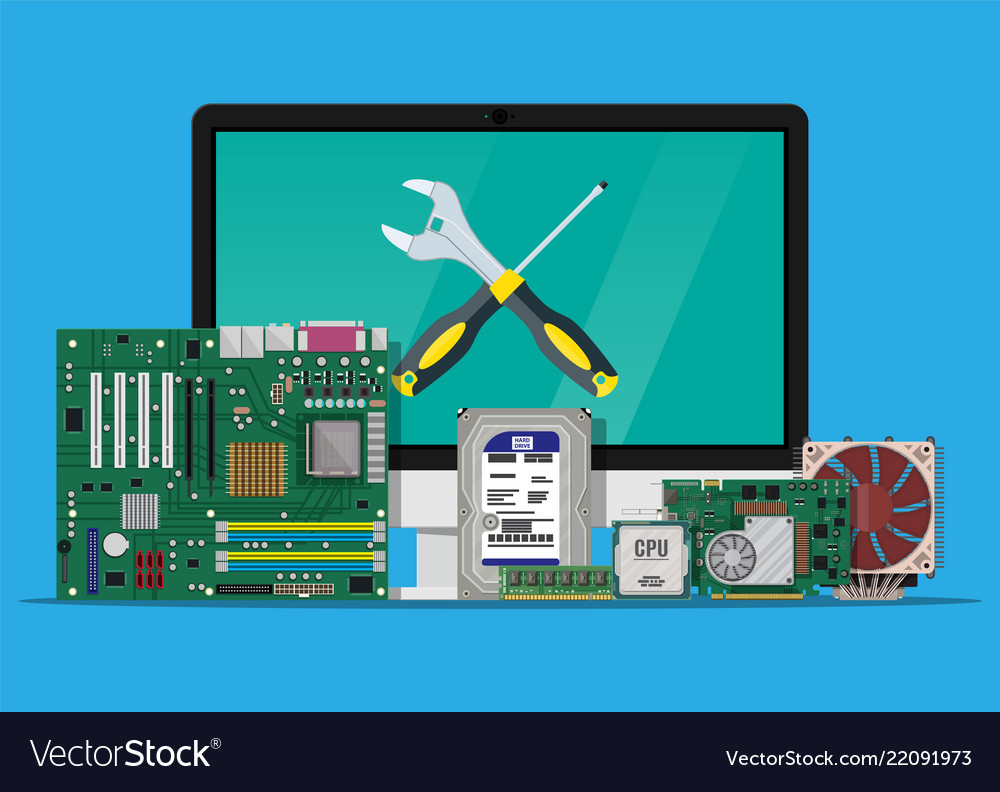
Despite what sort of PC you're building (work space or gaming), the parts you want will be something similar. You'll require a motherboard, a focal handling unit (computer chip), capacity, memory, a power supply, a case, and a screen. The main thing you probably won't require on the off chance that you're for the most part involving this PC for work space undertakings is a GPU (illustrations handling unit), however it's fundamental for photograph or video altering and gaming. That is a great deal of stuff! Here is a little breakdown of what every part does, alongside some equipment proposals.
Motherboard:
Every single other part associates with this circuit board. It's the avenue they use to grant and collaborate. They come in different sizes and arrangements, and each one looks to some degree changed, but they all fill a comparative capacity. Guarantee you know which processor you want before you buy a motherboard.
Motherboards show up in a few flavors, yet the most compelling thing to know kind of connection it has. There are basically two: LGA and AM. You'll continually see them recorded with a number after them, as "LGA1150" or "AM3." The particular numbers after the LGA and AM sections of these connection names will change long term, to show which time of Intel or AMD chips they support, but the continuous standards beginning around 2022 (which will work with the latest chips from either maker) are LGA1200 for Intel and AM4 for AMD.
Motherboards moreover show up in a few sizes, the most notable being ATX (or "standard size"). That is the very thing that I overall recommend, especially accepting this is your most essential structure. Your PC case will list which size motherboard it maintains, so guarantee they coordinate.
Buying direction: Motherboards are less sparse than various parts on this summary. We endeavor to keep this overview revived reliably with costs that are definitely not an overabundance of higher than MSRP, but if any of the costs here skyrockets between invigorates, search around. Your conceivable outcomes finding a reasonably assessed motherboard are infinitely better to your conceivable outcomes finding a fair expense on a GPU.
ASUS ROG Maximus Legend (LGA 1200 Attachment): As its name proposes, this is a superior exhibition motherboard for gaming machines. Assuming you're getting an Intel i9 processor, this is our proposal.
MSI MPG Z590 GAMING CARBON WIFI ATX (LGA 1200 Attachment): This motherboard is natural to utilize and loans a boss carbon-fiber feel to your general form. There are a lot of committed RGB choices for fans and other lighting, and the metal intensity sinks integrate your entire tasteful.7
Processor (CPU):
This is the mind of your PC. It attachments straightforwardly into the motherboard, and it's the absolute most significant part of your PC. That doesn't mean it must be the most costly (we'll get to that later). On the off chance that the computer chip doesn't specify including warm glue, get some. Try not to eat your central processor. I realize it looks scrumptious, however it's not really food.
Purchasing guidance: You will see the most elevated markups on your computer processor and GPU. However, these costs will move around a lot, so continue to inquire in the event that you can't bear the cost of the part you need right now.
AMD Ryzen 3 3200G 4-Core 3.6 GHz: Since 1080p gaming isn't particularly CPU-intensive, this is a good all-around choice. It pairs well with the included Wraith cooler, but the Cooler Master Hyper 212 is also a good choice.
Intel Core i5-11400 6-Core 2.6 GHz: Intel's latest i5 offerings are a great choice for everyday workloads and won't get bogged down by your games, as long as you have the GPU horsepower to pull most of that weight.
Graphic Card (GPU):

In the event that you'll mess around on this PC, you'll require a designs handling unit (likewise called an illustrations card). This is a specific processor that is planned and upgraded for taking care of visual information like the designs in games. It's additionally utilized in video and photograph altering and different designs concentrated assignments.
Purchasing counsel: These cards are hard to track down in stock (or at a sensible cost) right now, so you might need to stand by some time. Illustrations cards are among the most sought after PC parts at the present time, and their costs are way higher than they ought to be. That is the reason the singles out this rundown are by and large mid-to very good quality. In the event that you will shell out some serious cash for a designs card, ensure it's a decent one.
MSI GeForce RTX 2060: On the off chance that you're hoping to get into medium-to top of the line gaming, this card finds some kind of harmony among power and cost.
Asus ROG Strix RTX 3060: Nvidia's 30-series illustrations cards are frequently unavailable because of the worldwide chip lack, however in the event that you can find one at a sensible cost, the RTX 3060 is a stellar 1080p and 1440p gaming designs card.
Storage:
This is your PC's stroll in storage room. This is where you store every one of your records, your games, your motion pictures, your archives, your photographs, your beginning and end. You can continuously add more capacity later.
Samsung 980 Pro M.2 SSD: Samsung's M.2 drives are always a good choice. They're quick, durable, and itty-bitty (about the size of a stick of gum), so they can pair with just about any other internal SSD you'd like. Most motherboards have an M.2 slot either on the front of the board or around back, and you don't even have to mess with any cables. This one clocks in at around 6,980 MB/s read speed, and 4,876 MB/s write speed.
Memory (RAM):
You'll see a great deal of similar terms while you're taking a gander at memory and capacity, however they're totally different. Memory is more similar to that one table you throw things on to manage later. It's scratch paper; it's present moment. It's vital, however, on the grounds that product utilizes memory to reserve (briefly store) information where it very well may be recovered rapidly.
Corsair Vengeance LPX 16-GB 288-Pin RAM: High-end gaming rigs always go for 32 or 64 gigabytes of RAM, but a good old pair of 8-GB sticks will see you through most 1080p games and everyday tasks.
G.Skill Ripjaws V Series 32-GB 288-Pin RAM: With this much RAM, you should be pretty well set for everyday tasks and gaming.
Corsair Dominator Platinum 64-GB 288-Pin RAM: If you need extra heft for content creation or high-end gaming, consider stepping up to 64 GB of RAM.
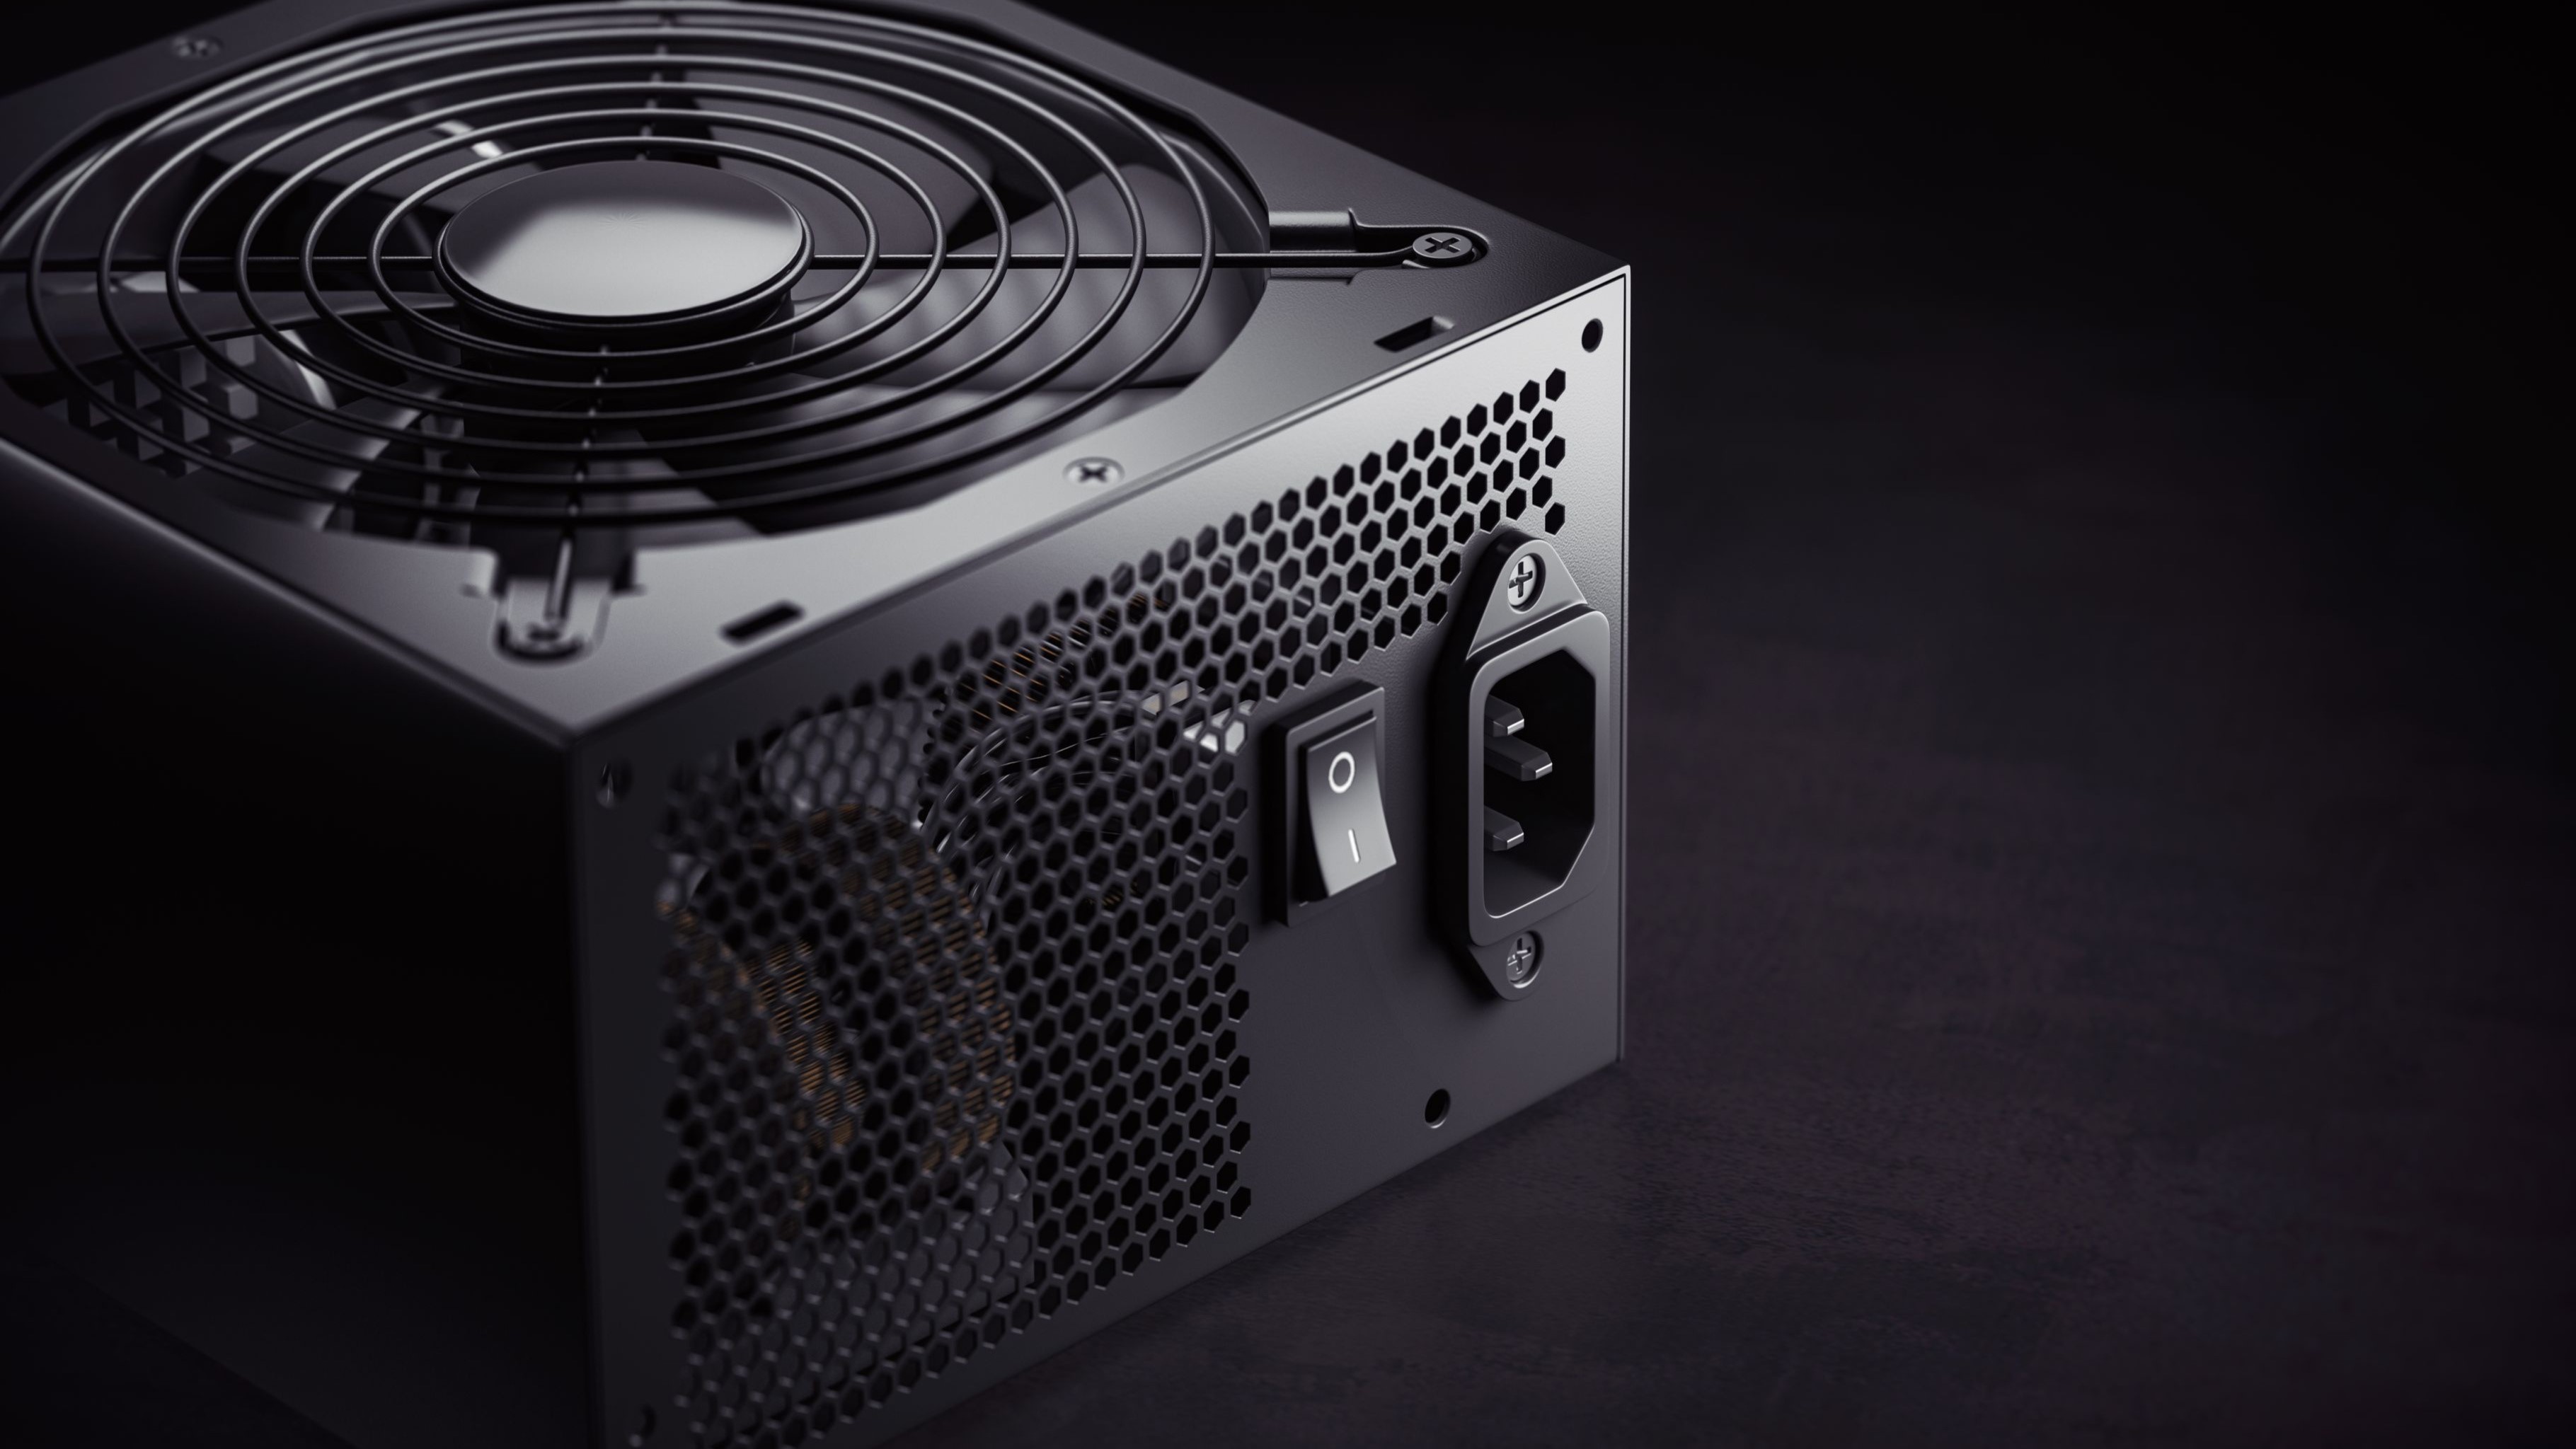
Power Supply(PSU):
Your power supply unit is a little box that keeps the power hurrying to each part. It decides how speedy and strong your PC can be. The quicker it is, the more power it requirements, and you generally need to have somewhat more than you really want, for good measure. Very much like GPUs, PSUs are additionally all through stock at this moment.
EVGA Cosmic explosion 750 GA Power Supply: You ought to continuously decide in favor having more power than you want, and this unit will give precisely that.
NZXT E850 850-Watt Power Supply: This 850-watt power supply ought to give sufficient pull to run even the most top of the line and requesting constructs.
EVGA Cosmic explosion 1,000-Watt Power Supply: For laptops with numerous designs cards or a ton of capacity, EVGA's 1,000-watt PSU is a decent pick.
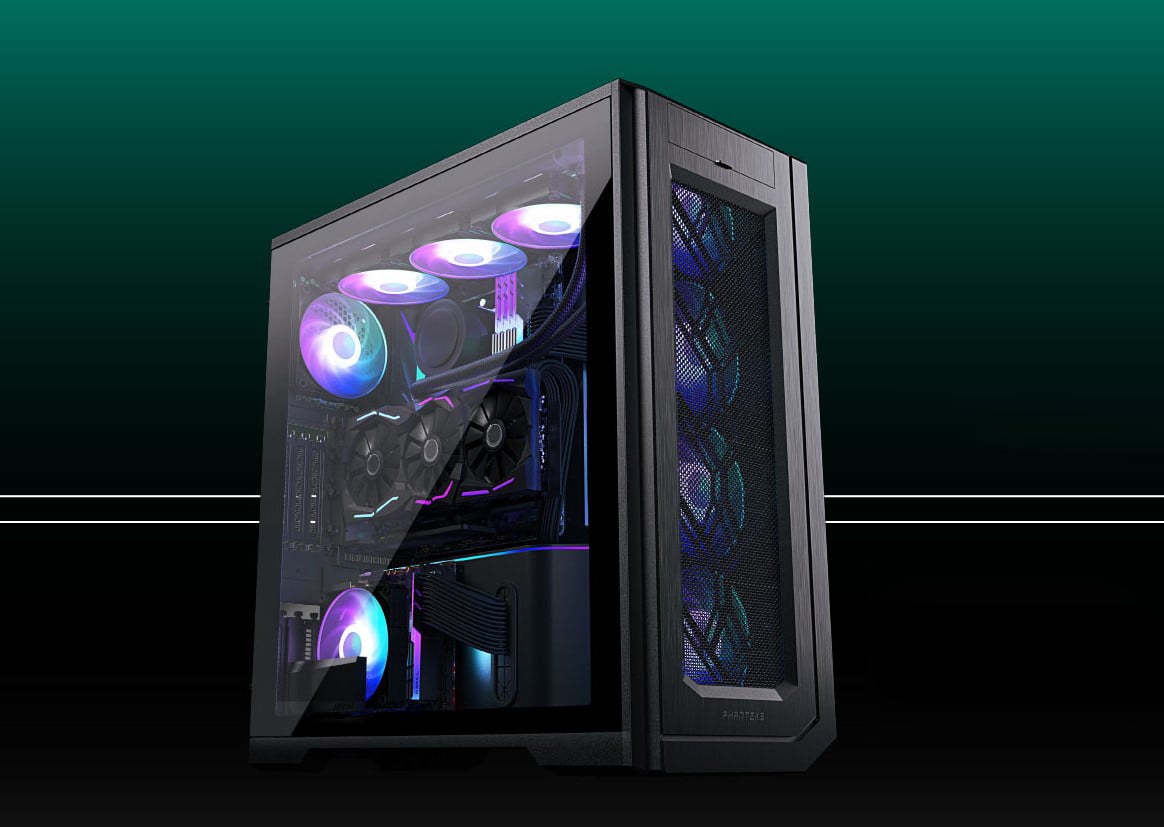
Case & cooler:
Your case is exactly what it seems like. It's a metal box. It very well may be canvassed in glass boards and carved aluminum, however inside a major metal box keeps it all intact. Ensure you coordinate it with your motherboard size. For instance, assuming that you have an ATX motherboard, you really want an ATX (or "standard size") case.
Corsair Obsidian Series ATX Full Pinnacle: There are heaps of sorts of cases. Some are minuscule, others are tremendous. Also, your choice will eventually boil down to the plan you like as much as whatever else. Assuming that you're uncertain what to get, this one is perfect for your most memorable form. Other case producers we like are NZXT, Fractal, Phanteks, Cooler Expert, and Lian Li.
NZXT H710i ATX Mid-Pinnacle: This is one of my absolutely favorites. It has a smooth tasteful and marginally reduced outline without compromising cooling capacity or openness.
MSI Gungnir 100 ATX Mid-Pinnacle Case: This spending plan cordial case is a strong choice for the vast majority. Know that it'll be a tight fit — there's practically no leeway for cumbersome links or hyperspecific designs. It looks more pleasant than you'd suspect for the cash, and the RGB button adjusts your lights with next to no work. The smokey safety glass permits them to radiate through without transforming your office into an EDM show.
Working Framework.
Assemble Everything:
The inner format of each and every gaming PC is somewhat unique, so we won't get excessively far off course here. Your smartest choice for explicit directions for your equipment will reference your manuals and looking for your parts on YouTube. It tends to be really useful to see an individual handle and introduce your precise equipment, particularly when you're stuck and can't exactly sort out what on God's green earth your manual is discussing. Be that as it may, here are a few general ways to assemble this large number of parts.
To start with, prep yourself a perfect work area. This can be a lounge area table, a tidied up work area — only any surface large enough for your case to lay level on its side, with adequate room around it until the end of your parts. You'll likewise require a Phillips-head screwdriver that will fit the screws on your case. At the point when you set up these parts, make certain to release any static development and work on a nonmetallic surface like a wooden table. Or on the other hand you could simply gather the motherboard on top of the cardboard box it comes in.
The greater part of the parts you purchased will accompany guidance manuals; keep them convenient. We will begin with the motherboard, so open up the guidance manual to the establishment page. It tends to be really scary — there's a ton to check out — yet consider this a major Lego set. Each piece squeezes into one another piece. For the motherboard, your most memorable occupation will be seating your computer processor.
Introducing Your computer processor
Contingent upon what sort of computer processor you bought (Intel or AMD), the chip will have either little prongs on one side (don't contact them) or minimal brilliant contacts on one side (don't contact them). Truly, don't contact that side of your chip. Oils from your fingertips can harm the contacts, or you could twist a pin. Do possibly one and your processor turns out to be just a costly hunk of silicon.
It is quite simple to Situate your processor. In the first place, twofold check your motherboard's directions and ensure you've opened the processor attachment. It'll be a major square with a lot of little openings (or contacts), with a switch or button close to it. Your motherboard's guidelines will say expressly how to open the attachment so you can place your processor in with practically no issues.
Whenever you've affirmed that it's opened and prepared, simply find which corner of your processor has a little brilliant triangle and line it up with a similar image on your motherboard's processor attachment. Delicately lower the processor into the attachment, then tenderly flip the hook or locking system. You shouldn't need to battle it. Assuming you need to press truly hard, twofold check that the processor is socketed accurately.
Then, you will require your warm glue. That negligible plastic needle of gleaming goo is vital for this following stage. Now that your processor is situated, investigate the sparkly square of silicon in the focal point of it. That is where your intensity sink will sit. Your processor accompanied an intensity sink, and on one side of it, you'll see a copper circle. You will put the intensity sink straightforwardly on top of the processor after we apply the warm glue, with the silicone square and the copper circle arranging impeccably.
Feel free to painstakingly press a minuscule ball (no greater than a pea) of warm glue onto the silicon square on your processor. You'll need it as near the middle as you can get.
Presently line up your intensity sink with the screws encompassing your processor, and tenderly lower it into place. You will crunch the warm glue, and the objective here is to make a flimsy layer covering the rear of your processor. It's alright in the event that it overflows a smidgen, yet on the off chance that it overflows out and past the brink of the processor, you utilized excessively. Get some isopropyl liquor, touch it on a build up free endlessly wipe the processor and intensity sink. Stand by till they're completely dry and attempt once more.
Assuming it looks okay, screw your intensity sink into place. Flip back to your motherboard guidance book and track down the perfect locations close to the processor attachment to connect your intensity sink's cooling fan. It ought to be exceptionally near your processor attachment. Whenever you've tracked down it, plug it in — congrats, you just introduced a computer chip. This was the hardest part, and it's finished. Nailed it!
Introducing Your Capacity and Memory
Memory is perhaps the least demanding thing to introduce. See those upward little attachments close to the central processor? Line up your sticks of Smash and space them in, beginning from the left-hand opening. They'll get into place whenever you've situated them appropriately. In the event that you have two sticks of Smash, make a point to skirt an opening between them. Your motherboard manual ought to say which spaces to utilize.
For your hard drive or strong state drive (SSD), find an unfilled straight in the forward looking piece of your case. Slide your drive in and screw it into place. On the off chance that you have a M.2 drive (a small SSD about the size of a stick of gum), there ought to be a put on the motherboard where you opening it in straightforwardly. Look at your motherboard's manual to see where the M.2 space is in the event that you can't track down it.
Introducing Your Motherboard and Power Supply
The remainder of this is equation based. Begin by putting your motherboard into your case. Counsel your motherboard's directions, line up the screw openings for the situation with the ones on your motherboard, and get to work.
Then, you'll need to supply introduce your power. There ought to be a spot for it close to the top or lower part of the case, a major square spot that will accommodate your inventory impeccably. On the off chance that you're experiencing difficulty tracking down it, check out at the rear of your case: There'll be a major void square. That is where the power supply goes (and where you'll connect your PC when you're completely finished). Whenever you've tracked down its home, space it in and screw it into place.
Ensure every one of the twisted links emerging from the power supply will come to your motherboard with space in excess. Try not to connect anything yet; we will return to the power supply in a little.
Introducing Your Illustrations Card
Your GPU will be quite huge. Indeed, even an unassumingly strong GPU like the GTX 1060 is enormous contrasted with your different parts. That implies how it squeezes into your case is significant. When you put your GPU in there, space will begin getting tight.
Once more, flip open your motherboard's guidance book and search for a PCIe space. It will be a flat opening with a little plastic hook close to it, close to the center or lower part of your motherboard. That is where the GPU connects. You should simply recognize the rear of your GPU (the side with the HDMI and DisplayPorts), line that up with the rear of your case, and drive the GPU into the level space. It ought to get into place effectively enough; on the off chance that it doesn't, ensure you're embedding it accurately.
Track down another of those little screws and affix your GPU to the case. There's a little spot for that on a similar piece of metal with the HDMI ports. It ought to be not difficult to track down.
Presently, investigate the links emerging from your power supply. There ought to be a not many that seem as though they could squeeze into the square (or rectangular) attachment on your GPU. It ought to seem to be six or eight little openings in a square shape. In the event that you're experiencing difficulty, investigate this video from equipment producer Asus. A portion of the particulars will be unique, yet it's an extraordinary glance at how to introduce a GPU.
Lace Links
The motherboard should be guided into every one of your gadgets. The power supply unit I utilized in this form's called completely secluded, and that implies that you can choose the links you want and leave the rest off to wipe out mess. In any case, power supplies have a lot of links, and you'll need to manage the unused power associations hanging inside your case. You'll have to interface the PSU to the SSD and the motherboard.
You additionally need to plug the motherboard into your case — the power buttons, sound attachments, and USB ports on the facade of your case. There are unique headers for every sort of fitting spread around the board, so you'll need to actually look at your manual for the area and capability of each gathering of pins. These small pins should be connected a specific way, and they're staggeringly minute. There's likewise a hookup for the case's fan — for the situation I utilized there was one header on the motherboard however three fans introduced. Then there's the SATA link for your SSD, which connects to the motherboard.
This piece of your fabricate truly relies upon the equipment you bought, so counsel the manuals for every part to guarantee you've accurately connected it to your motherboard and the power supply.
Boot It Up and Introduce Windows
The last phase of your construct is a straightforward one: Hit your power button. Assuming that the PC hums to life, you most likely assembled it flawlessly! In the event that it doesn't, don't surrender. There are a ton of potential issues that could make a PC neglect to boot up interestingly. This video from Kingston goes over certain entanglements that could cause you a few cerebral pains, so in the event that you're not ready to boot your PC, give it a watch and backtrack your means.
There's likewise an opportunity you might have gotten flawed parts. This video goes over certain tips on the best way to really look at your parts. As a general rule, in the event that you're experiencing difficulty with a particular part, YouTube is your companion. There are lots of supportive PC-building instructional exercises.
If it started up just fine, the next step is super easy: Turn it off. Remember that Windows flash drive you made earlier? Plug it into the PC and boot it up again. If you set it up right, your computer should just do its thing and get started installing Windows. If not, you might need to open your BIOS (check your motherboard's manual for how to do that) and set the USB drive to be a “boot device” first. Here's a brief rundown of that process (start at step 3).